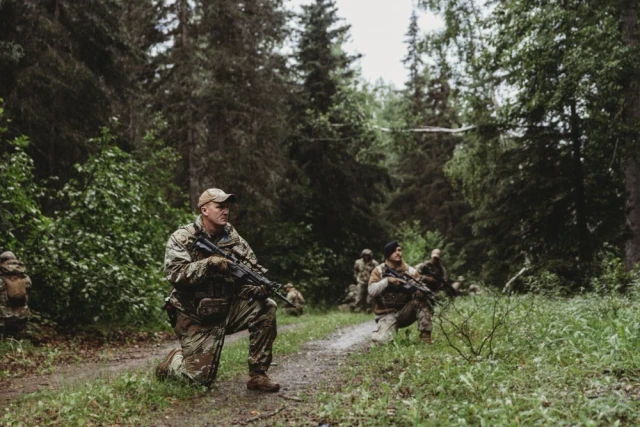
Crossing an Open Danger Area
An open area is the one danger area you are usually allowed to go around — and doctrine gives you two ways to do it plus a third for when you cannot. The box method, the contour method, and the bounding cross, animated step by step for a squad by a Ranger and Sapper qualified 11B.
Bypass or Cross — and Why the Test Is Time
A danger area is "any area on the route where the terrain could expose the platoon to enemy observation, fire, or both" (ATP 3-21.8). A linear danger area — a road, a trail, a stream — has to be crossed, because you cannot go around a road. An open area is different. It is the danger area you are usually allowed to avoid entirely, and doctrine expects you to.
The split between a small open area and a large one is the part leaders get wrong, because it is not written in metres. A small open area is one "small enough to bypass in the time allowed for the mission" (3-128). A large one is "so large that the platoon cannot bypass it due to the time needed to accomplish the mission" (3-127). The same field can be small on a movement with slack in it and large when you are already behind time. It is a judgement about your clock, not a measurement.
If you can go around in the time you have, go around — using the box method or the contour method, and the squad never leaves the treeline. If you cannot, you cross under traveling and then bounding overwatch, and you accept being in the open. Doctrine writes the test in time specifically so that leaders do not talk themselves into the third option when the first two were available.
The Detour Bypass — the Box Method
Four 90-degree turns around the open area. Watch the pace count: two of the four legs go in a bucket that never touches your forward progress, and getting that wrong is how a squad ends up walking a line parallel to the one it planned. Five phases. Tap the diagram for fullscreen; use the arrows to step through at your own pace.
The Contour Method
Faster, less bookkeeping, one weakness. Everything hangs on the near-side point where you stop the count and the far-side point you pick to walk to — and that far-side point has to be a feature that genuinely sits on your azimuth. Five phases. Tap the diagram for fullscreen; use the arrows to step through at your own pace.
When It Is Too Big — Crossing Under Overwatch
The other half of the decision. When going around costs more time than the mission has, you stop bypassing and start crossing — traveling overwatch for speed, then successive bounds once you are inside small-arms range of the far wood line. Teams on line side by side, SL behind controlling, 3 to 5 second rushes, one team moving while the other is set and covering. Two full bound cycles shown. Eight phases. Tap the diagram for fullscreen; use the arrows to step through at your own pace.
As an Amazon Associate, WarfighterForged earns from qualifying purchases · Affiliate disclosure
Don’t Miss the Next Drill
More patrolling and battle drill pages are being built right now, animated the same way. Subscribe and I’ll let you know the moment new tactics, articles, and gear reviews go live.
Task · Conditions · Standards
Move a squad past an open danger area without being observed or engaged, and arrive on the far side still navigating accurately — by bypassing it if the mission clock allows, or by crossing it under overwatch if it does not.
A squad conducting a dismounted tactical movement on a known azimuth with a maintained pace count encounters an open area on its route. Enemy contact is possible but not yet made. Near-side and far-side rally points are either planned or drawn from the nearest en route rally point.
The squad halts and the leader confirms the danger area and makes the size call against mission time. It bypasses or crosses using the appropriate technique. Security is oriented on the open ground throughout. The squad arrives at the far-side rally point with its azimuth and pace count intact, accounts for all personnel, and resumes the mission.
Which Method, and When
Doctrine is unhelpfully even-handed here. ATP 3-21.8 offers the two bypass techniques as co-equal options with no comparison and no selection criteria at all. The only decision guidance in the entire passage is about which side to contour around: "after considering the distance, terrain, cover and concealment" (3-129). Everything below that line is instructor judgement rather than doctrine, and it is worth knowing which is which.
The practical selector taught by land-navigation instructors comes down to one question: can you see a distinct feature on the far side that sits on your azimuth? If yes, contour to it — it is faster and there is almost nothing to write down. If no — you cannot see across, it is night, the far side is featureless or nothing over there is unmistakable — box it, because the box method needs nothing but a compass and a disciplined count.
Contour — Faster, Less Precise
You walk an uncounted route and estimate the leg you skipped.
- Needs a visible, distinct far-side feature that is genuinely on the azimuth.
- Costs accuracy — the whole method rests on one eyeball estimate of a distance nobody paced.
- Best in daylight, open terrain that reads clearly, and when you are pressed for time.
Box — Slower, Exact
You count everything and cancel out what did not move you forward.
- Needs nothing but a compass and the discipline to hold three separate numbers.
- Costs time, and one more chance to fumble the count on every leg.
- Best at night, in fog, in thick vegetation — anywhere the far side gives you nothing to aim at.
Cross — When Neither Fits
Reserved for the area that is too large to bypass in mission time.
- Traveling overwatch first, deliberately, "to save time."
- Bounding overwatch once contact is expected or you are within ~250 m of the far side.
- Re-form beyond the open area and continue.
The Pace Count Rules
Both bypass methods exist for the same reason: to get you around an obstacle without wrecking your dead reckoning. TC 3-25.26 states the governing rule plainly — "only paces taken toward the final destination are counted as part of your forward progress." Everything else follows from that one sentence.
On the box, that means three buckets, not one. The offset leg and the return leg are equal, opposite, and both excluded; only the travel leg is added. The offset and return still have to be counted accurately even though they never touch your total, because the return has to exactly repay the offset — that is what puts you back on the original line rather than a line parallel to it.
On the contour, there is only one bucket and one estimate. You stop the count at the near-side point, walk an uncounted route, and add your estimate of the straight-line distance across once you reach the far-side point. The turn arithmetic on the box is simple enough to do cold: "To turn clockwise (right) 90 degrees, you must add 90 degrees to your original azimuth" — and subtract for a left turn.
Neither method fails loudly. A short return leg or a far-side feature that was not truly on the azimuth both produce the same result: the squad walks away on a line parallel to the one it planned, feeling fine, and finds out the objective is not where it should be a kilometre later. TC 3-25.26 ranks "failure to travel the proper distance" second on its list of the most probable navigation errors for exactly this reason.
Common Mistakes
- Not recognising it as a danger area at all. JRTC observers have reported for decades that units "fail to recognize danger areas as such." An open area you walk into without a decision is the worst version of all three.
- Making the size call on distance instead of time. The test is whether you can go around in the time the mission allows. Leaders who eyeball the width and call it large end up in the open unnecessarily.
- Adding the offset and return legs to forward progress. The single error the ATP 3-21.8 bypass procedure exists to prevent.
- A return leg that does not match the offset. Puts you on a parallel line permanently.
- Contouring to a feature that is not on the azimuth. Same outcome as above, arrived at from the other side. A back-azimuth to the near-side point costs seconds and catches it.
- Losing the count when the lead element changes. CALL specifically directs that the compass and pace men "exchange pace and azimuth data." On a box you are holding three numbers — hand over all of them.
- Breaking down into a crossing posture to bypass. There is no near-side and far-side security element on a bypass, because nothing is crossing. Setting one up wastes the time that made bypassing the right call.
- Security oriented inward. The open area is the threat axis. Flank security faces out into it for the whole movement.
- Bounding the entire way across a large area. Doctrine picks traveling overwatch first on purpose, to save time.
- Calling the 250 m shift late. Judged on the move, in the open, with no cover. The cost of being slow is that the first burst arrives with all nine men walking.
- No far-side rally point. Both bypass methods name one, and it is the only control measure either of them has.
- Never rehearsing it. The most-cited cause in every CTC observation on danger areas. A squad that has not rehearsed a box will improvise one, slowly, in the open.
Sources
More Like This
 // tactics
Conduct an L-Shaped Ambush, Animated Step by Step
Thirty phases, from the leader’s recon at the ORP to the choke-point withdrawal.
Read it → // tactics
Platoon Movement to Contact, Animated Step by Step
Forty men, 21 phases, from the LD to the red-white-blue withdrawal.
Read it → // tactics
Army Movement Formations & Techniques, Animated Soldier by Soldier
Every formation and movement technique, animated soldier by soldier.
Read it →The 4-Week Hybrid Military Program
The exact framework I use myself — built for the soldier juggling unit life, school, and a real schedule. Free PDF delivered to your inbox in under 60 seconds.
- 5 lift days · 3 run days per week, supersets for 45-minute sessions
- Week-over-week progressions targeting AFT and combat-MOS standards
- Hybrid framework — strength, conditioning, and recovery, balanced
- Built around real soldier schedules — unit time, school, family
@warfighterforged
Daily carousels. Real soldier breakdowns.