Breach an Obstacle
Mines and wire are only as good as the fire that covers them, so the breach starts with the firefight. Suppress the far side, obscure it, secure and reduce the breach point, mark a lane, and assault through. Here is the breach drill, step by step, the way it runs on the ground.
Interactive Walkthrough
Hit play and watch the drill unfold from above, or step through it at your own pace. Gold is A Team, blue is B Team, white is the squad leader, red is the enemy. Every movement on the map matches the written steps below.
The Ranger Handbook (TC 3-21.76) is the source for every drill on this page — mandatory kit for any military leader.
Don’t Miss the Next Drill
More patrolling and battle drill pages are being built right now, animated the same way. Subscribe and I’ll let you know the moment new tactics, articles, and gear reviews go live.
Task · Conditions · Standards
Conduct the initial breach of a mined wire obstacle covered by enemy fire: suppress and obscure the far side, move a breach element to the breach point, reduce the obstacle and mark a lane, and assault through to secure the far side and pass the follow-on force.
The platoon's movement is stopped by a wire obstacle reinforced with mines that cannot be bypassed, and the enemy engages the platoon from positions on the far side of the obstacle.
The platoon breaches the obstacle and moves all personnel and equipment quickly through the breach, moves the support element and follow-on forces through, and maintains a force able to secure the far side of the breach.
The Full Sequence
Squads that walk this drill on a terrain model before stepping off run it clean the first time live — build the objective, talk every phase.
Comms & Reports
SOSRA — The Breach Sequence
The five-step order that governs every breach:
- Suppress — win the firefight on the far side
- Obscure — smoke between the enemy and the breach
- Secure — control the breach point
- Reduce — cut wire / Bangalore / probe mines
- Assault — through the marked lane
The Breach Command
One order that assigns the whole breach:
- Breach point and the route to it
- Who suppresses — SBF squad / position
- Who reduces — breach squad
- Who assaults — assault squad
- Lift/shift instructions and signal
On the Obstacle — Reduce
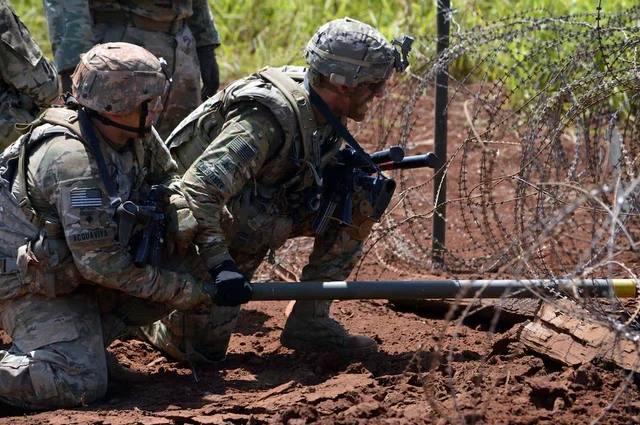
The breaching team’s actions at the wire:
- TL + AR — close-in security on one flank
- GRN + RM — probe for mines, cut wire (Bangalore preferred)
- Mark the path as you go
- Far side secured, then signal “LANE”
Lift & Shift Off the Breach
The signal that keeps fire off the breach team and assault:
- Shift direct fire off the breach point as the team reduces
- Keep suppressing adjacent positions
- Lift the moment friendlies are in the SBF's lanes: the far-side team becomes the local base of fire
Lane Marking & Guides
What turns a hole in the wire into combat power:
- Mark the lane per SOP — entrance, far side, width
- Post guides at the breach point
- Pass elements single file through the marked lane
ACE / SITREP
Re-cock and report so the company can exploit:
- Ammo — count and cross-level: the base of fire shot the most, so the breach and assault men give up mags until everyone is even
- Casualties — treat and evac priority
- Equipment — Bangalores, demo, sensitive items
- SITREP to the commander · pass the follow-on force
SALUTE, ACE, and every report above gets written, not memorized — in the all-weather leader book that’s standard issue for a reason.
Where Squads Fail This Drill
Breaching Without Winning the Firefight
Sending a breach team onto a mined obstacle while the far side still has effective fire is a mass-casualty event. Suppress and obscure first — the breach team only survives because the enemy is down and blind.
Not Isolating the Breach Point
If the SBF doesn’t isolate the breach point, the enemy concentrates every weapon on the two men working the wire. Suppress the adjacent positions specifically, not just the spot that fired.
Bunching at the Breach
A cluster of soldiers stacked at the obstacle is the target every enemy mortar and machine gun is registered on. Keep dispersion right up to the lane and move through it single file, fast.
Not Marking the Lane
An unmarked lane sends the next element into uncut wire or live mines. Mark the entrance, the far side, and the width per SOP so every follow-on man flows through the exact cleared path.
Firing Across the Breach Point
A base of fire that never shifts off the breach point kills its own breach team. Shift direct fire off the breach as the team reduces it, and keep suppressing everything else.
Rushing the Far Side Unsecured
Pouring the platoon through before the far side is secured turns the lane into a funnel into the enemy’s guns. Secure the far lip, widen the breach, post guides — then pass the force.